How to optimize Milestone XProtect deployment workflows

Table of Contents

As integrators installing Milestone, we have come up with our best practices and standard workflows to maximize efficiency and success. For the most part these workflows were developed around the tools we had built into Milestone XProtect.  But, what if you could now revisit your standard workflows and optimize them based on newer management tool sets available to you? We always talk about optimizing Milestone to perform better and be more efficient – let’s think about how we can do the same with our process and deployment.

Staging

Staging is an important part of the deployment process.  If you are not doing this, you should. This is where you bench test all your devices to check for DOAs, update firmware, set IP addresses, NTP, close ports etc.  That said, one of the most time consuming/delay inducing parts of staging is trying to get the IP address information back from the client or IT. You send the sheet and then wait and follow up.  What if we prepped the cameras and left them at DHCP?

  1. Plug the cameras in to your lab network with DHCP
  2. Update the password to something temporary
  3. Perform the basic maintenance tasks to each device
  4. Add the cameras to Milestone with default values and names
  5. Confirm all is working, label and take them to site

Onsite Configuration

When onsite, you can finalize the configuration of the Milestone system as follows:
  • Plug the staged cameras into the production network with DHCP
  • Set IPs on the devices.  Scan the network with the camera manufacturer’s management tool and bring in the cameras with the new DHCP addresses.
    • Hopefully by now the client or IP has provided the static IP block for your cameras.  If so set the IPs on the cameras.
    • If the client/IT prefers DHCP reservations, leave the cameras as is.  We will provide the client/IT with a report later on with the IPs and MAC addresses.
  • Update the IP addresses in Milestone
    • Download a report from the camera management tool with the IPs and MAC addresses.
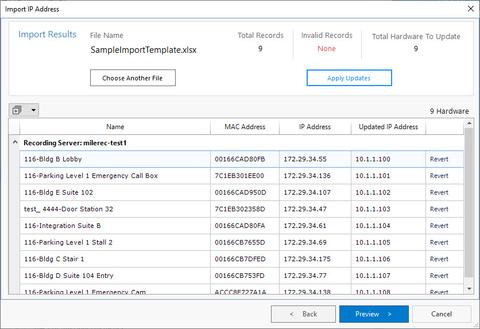
    • Update the changed IPs into Milestone via The Boring Toolbox IP Import function
    • Your cameras are now on-line

  • Rename the cameras.  In most instances the cameras we expected to be named one thing end up being renamed to something else.  Why do it twice? Let’s rename onsite once the camera is in the final position
    • Search for the camera MAC addresses
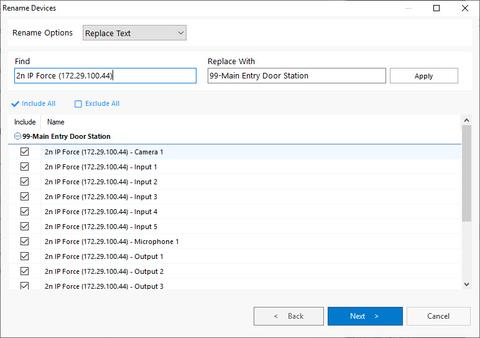
    • Select and bulk rename hardware and devices using the find and replace function to quickly finish this task

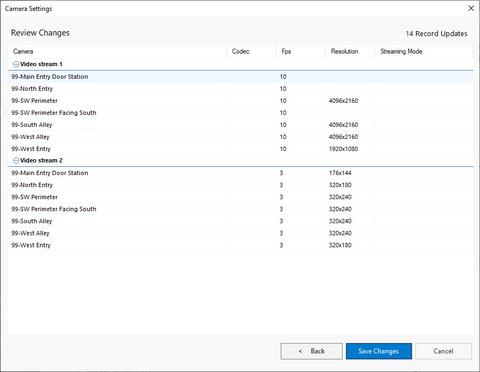
  • Set frame-rate and resolution across all devices using the settings function to apply consistent frame rate and resolution across all devices at once regardless of make or model

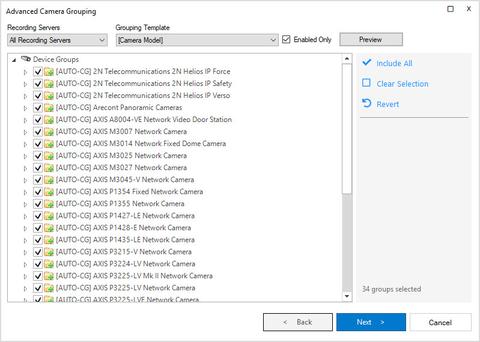
  • Using the Advanced Group Management feature, dynamically create device groups based on model, log into management client and push out additional device specific settings in bulk (ie: Axis zipstream)

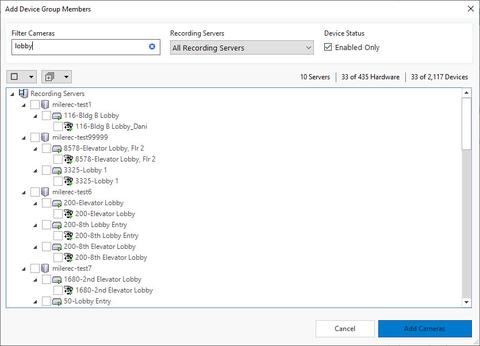
  • Using search in the add group members function, quickly create device groups based on role or location then log into management client and assign permissions to those groups.

Secure your Deployment

When done with the configuration, you are ready to button up the configuration:
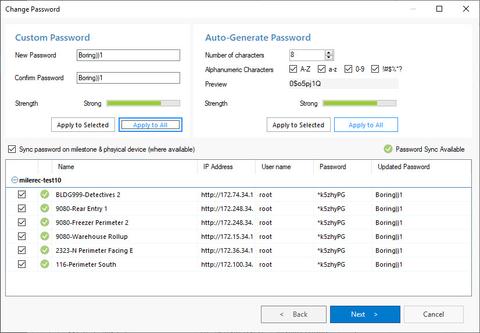
  • Update all passwords to the permanent passwords
    • When we started staging the cameras we used a temporary password on the cameras so that the install teams in the field can aim and focus the devices.  But now that it’s time to wrap up, we want to secure the cameras using a unique password we can hand over to the client.
    • Use the password management feature with synchronization to quickly update the passwords across Axis, Sony, Bosch, Hanwha and Arecont cameras while synchronizing those changes to Milestone XProtect

Documentation and Sign-Off

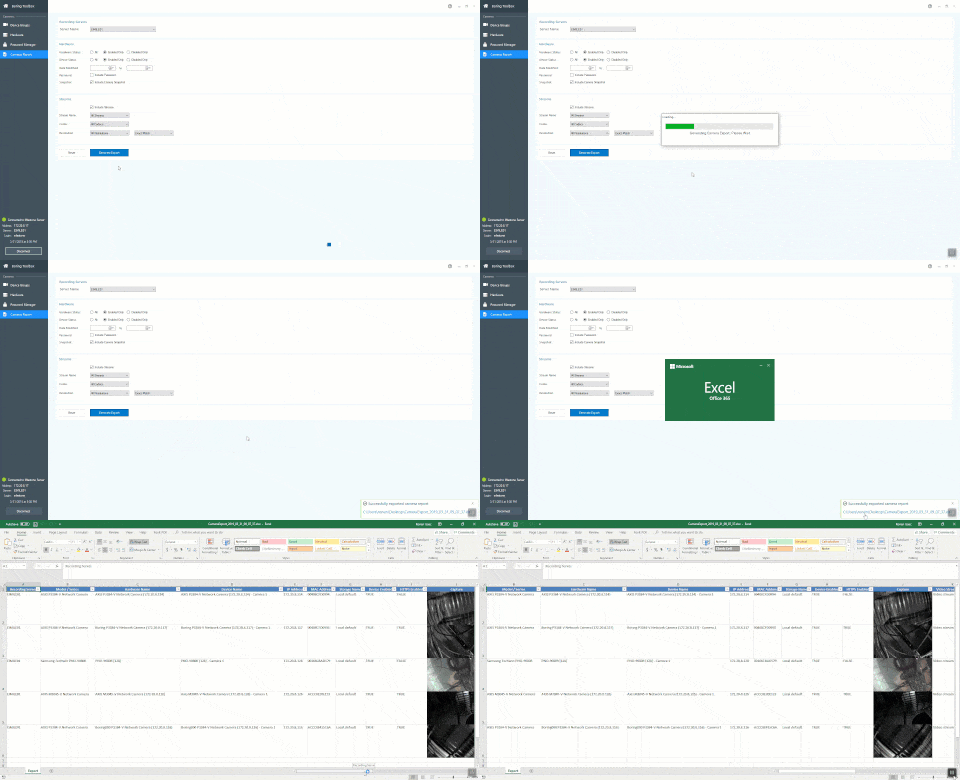
  • Finally, it is time to create the dreaded but oh so necessary documentation.  We have noticed that it could take between 30 to 120s to create the documentation for just one camera depending on what information you need to record.  For larger systems, this means hours of work to do correctly and is therefore sometimes overlooked. Using the camera reporting function we auto-magically create the final sign off report with all pertinent network, stream and camera details including credentials and point in time snapshots if desired.  
  • If using DHCP this report can also be provided to IT to create the DHCP reservations in their server.
  • Present this documentation and get your sign-off

Using this workflow and the features found in the Boring Toolbox can take your existing workflow, optimize it and save your teams from redundant, repetitive tasks while saving time and money.  The great thing about this workflow is that the time savings increases exponentially as the size of the system grows.

You can now rent the toolbox for 3 months, paying for itself with just one use.  Reach out to us if you are interested in learning more at support@theboringlab.com.

Team Boring

Your go-to XProtect eXPerts. We learn the technical stuff that will save you time and make it less boring.

Team Boring

Your go-to XProtect eXPerts. We learn the technical stuff that will save you time and make it less boring.

You Might Also Enjoy…