Managing over 240 cameras across a growing city isn’t easy—especially when one person is responsible for it all. See how...
We wanted to use Axis Loitering Guard ACAP analytic last week but found there is little to no documentation on how to get it to work with Milestone XProtect VMS. So here is how we connected the alerts from Axis Loitering Guard video analytics to alert in Milestone.
Edit 04/08/2020: After a great discussion on LinkedIn there is another method supported on some Axis cameras called Dynamic Device Event Handling. This method has been added below.
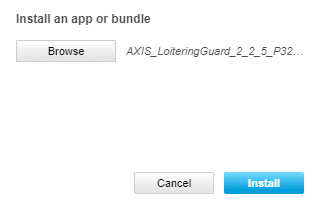
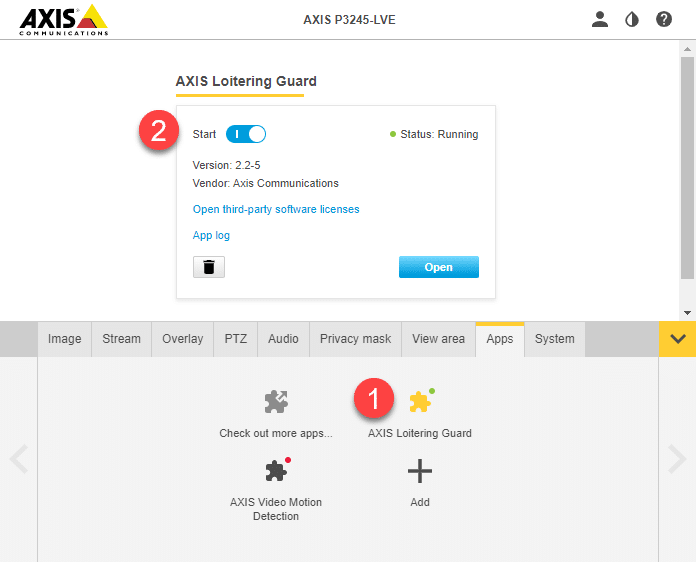
If you are not familiar with Axis’s camera platform they allow you to install applications on top of the camera much like your iPhone. These applications are called AXIS Camera Application Platform applications or ACAP for short and installation is quite straightforward.


Each ACAP will be different but for AXIS Loitering Guard you configure basic settings that will allow you to identify zones of interest, the dwell time of an object and perspective of the field of view.
Axis has a video on configuring Loitering Guard so I will not go into that here but below is an image that shows the calibration of the perspective, Axis calls this depth. Also note that you can have different loitering profiles, I changed the profile name in this case to FrontLoiter you can choose a name that makes sense for your deployment but we will need to know this later when we create events.
Once the ACAP is configured we can start working on sending these alerts to Milestone. To do this we will configure events in the Axis camera which will be received in Milestone as a generic event or, if supported, you can use dynamic device event handling.
The recipient in our case is the Milestone Event Server.
The rule is what listens for a trigger event and then performs an action. In this case the action is to send a TCP message to the Milestone Event server.
Now that we have the camera set up lets get Milestone ready to accept the notifications so that we can create rules and alarms based on the loitering events.
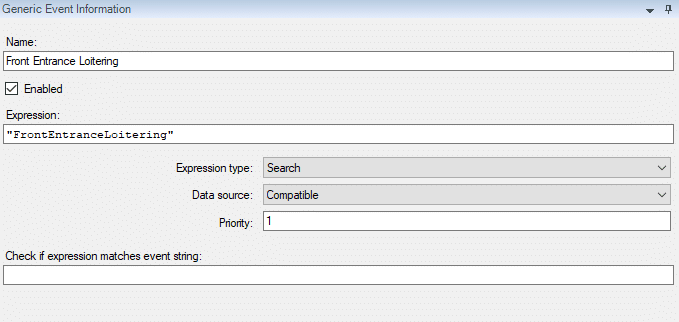
Generic Events in Milestone allow you to receive and parse HTTP or TCP messages that come in from any analytic or IOT device without the need for special drivers. In this case we will be receiving the TCP messages that the Axis camera will be sending us via the rule we set up.
Enable Generic Events
Create a Generic Event

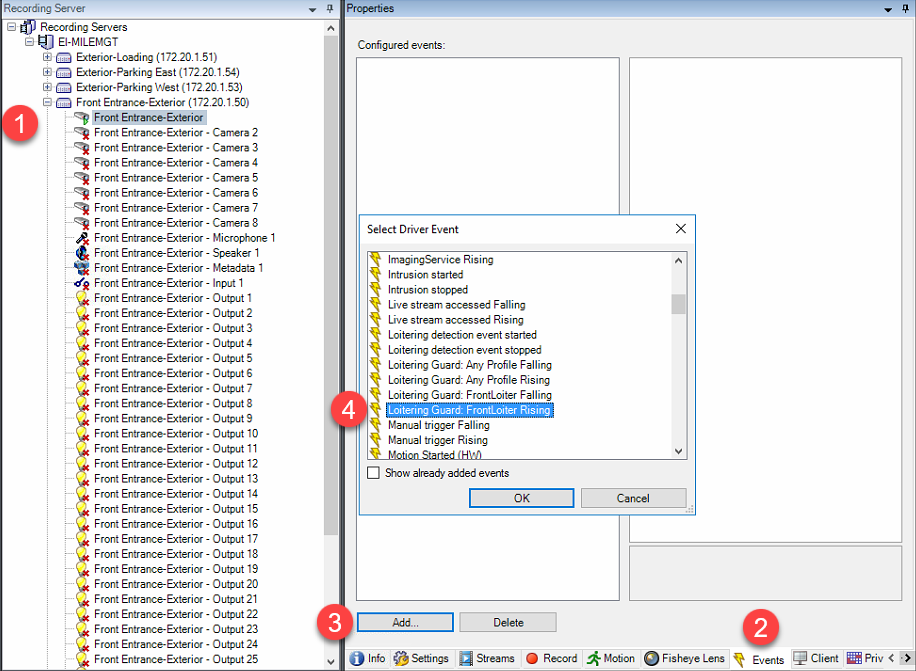
To simplify this process some Axis cameras support the ability to dynamically add the new ACAP events to Milestone.
Requirements
Here is the process:

We can now test our integration by creating a simple rule in XProtect that will create a log in the Milestone Log Server when the Milestone Event Server identifies a message sent from the Axis Loitering Guard analytic.
Create the rule in Milestone
Test from the Axis camera
We will go back to the Axis Loitering Guard configuration page and test the alarm. When we do this, a log entry should appear in the rule-triggered server logs in management client.

Now that you have the integration setup you can create more complex rules, set up schedules, create alarms, etc. To add additional cameras just repeat the above steps for each.

Your go-to XProtect eXPerts. We learn the technical stuff that will save you time and make it less boring.

Your go-to XProtect eXPerts. We learn the technical stuff that will save you time and make it less boring.

Managing over 240 cameras across a growing city isn’t easy—especially when one person is responsible for it all. See how...

This step-by-step guide shows you how to access Milestone XProtect from anywhere using Tailscale. It’s secure, simple, and way less...

Our new Identity and Access Management (IAM) platform makes it easy to manage what your users can see and do...
Subscribe to get a monthly dose of security & surveillance industry news and insights, Milestone VMS time-saving tricks, tips for hacking your way out of boring work sent directly to your inbox!