Zipstream can dramatically reduce storage and bandwidth in Milestone, but only if it’s enabled correctly. This guide breaks down how...
Cybersecurity is a big issue these days and corporate security and surveillance policies need constant review to proactively address potential threats. Enabling HTTPS between Milestone XProtect and your Axis cameras is a great way to secure the communications between Milestone and your devices. In this blog, we’ll explain why securing communications between your VMS and security cameras is important and how to do so effectively using HTTP.
HTTPS, or “Hypertext Transfer Protocol Secure”, is the secure version of HTTP. Both protocols send data between a website and a web browser. HTTPS encrypts your communications with a website, thereby protecting your data from being intercepted by someone else.
HTTPS is especially important when you are transferring sensitive data, such as logging into your bank or accessing your security system. By using HTTPS, you can be sure that your information is safe and will not be stolen by hackers.
By default Milestone XProtect uses HTTP to connect to the camera and to the video stream. When using HTTP however the credentials are passed between the camera and the recording server in plain text.
This means that a bad guy sniffing the network could quite easily identify the camera’s credential and use them for nefarious means. HTTPS is a method of securing those credentials from prying eyes. In this case, enabling HTTPS uses SSL to encrypt the credentials sent by the recording server to the camera instead of sending it in plain text for all to see.
The majority of enterprise video surveillance deployments do not take securing the credentials into consideration at the time of deployment which is why learning how to do this quickly and in bulk after the fact is very important.
If you are using Axis cameras deploying HTTPS with Axis Device Manger, Milestone XProtect and The Boring Toolbox is rather quick. Below are the steps to take.
Axis Device Manager is a tool provided free of charge by Axis which will allow you to fully manage the settings of your entire fleet of Axis cameras in bulk. To enable HTTPS between Milestone XProtect & Axis, you must first enable the certificate authority in Axis Device Manager, allowing Axis to start managing certificates.
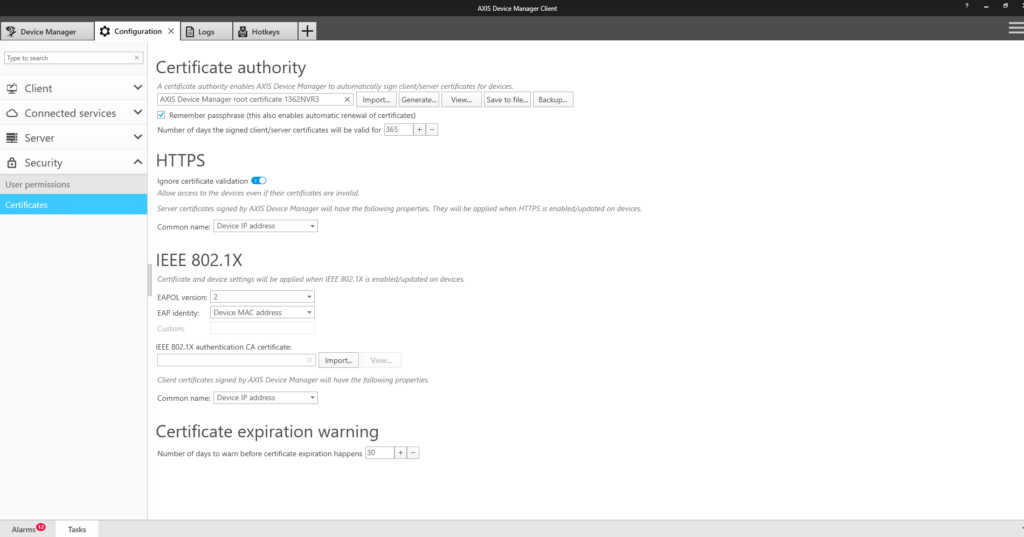

Be sure to record the password you chose as you will need that when you renew the certificates. With the CA enabled on ADM it is time to deploy HTTPS to the cameras.
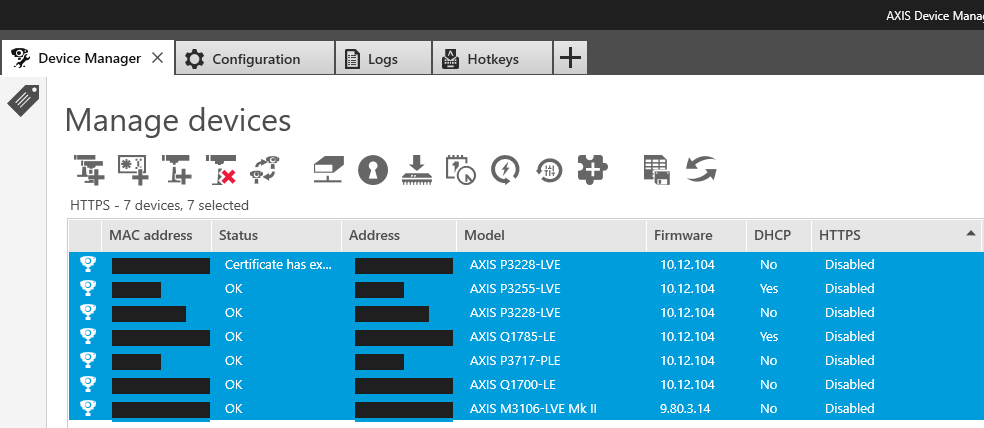
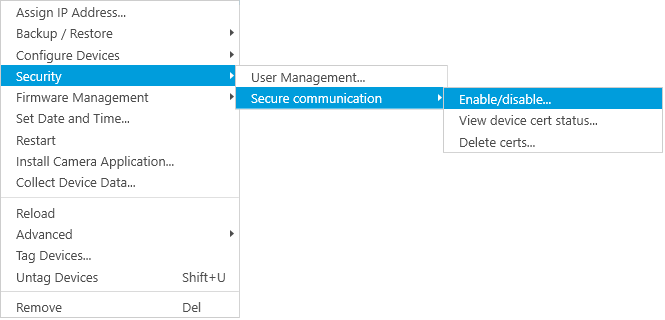
New follow the wizard to install a new certificate generated by the ADM CA and will ignore any other private certificates on the cameras.
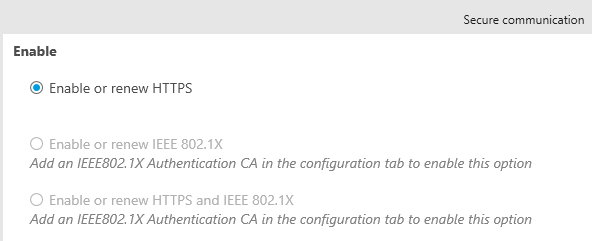
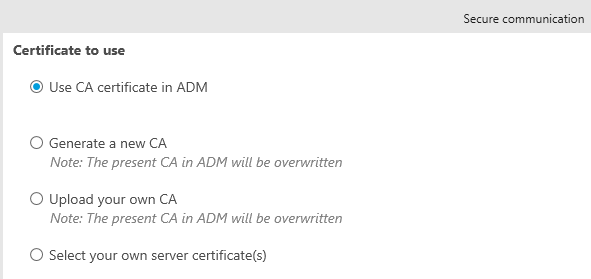
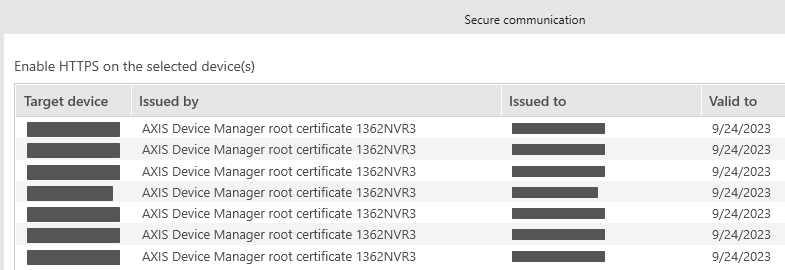
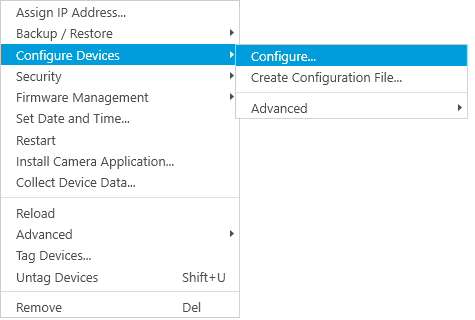
This is the last step in ADM is to enable both HTTP and HTTPS on the cameras. HTTP is used by Milestone to initialize the communication to the camera. The camera will then redirect the recording server to use HTTPS.
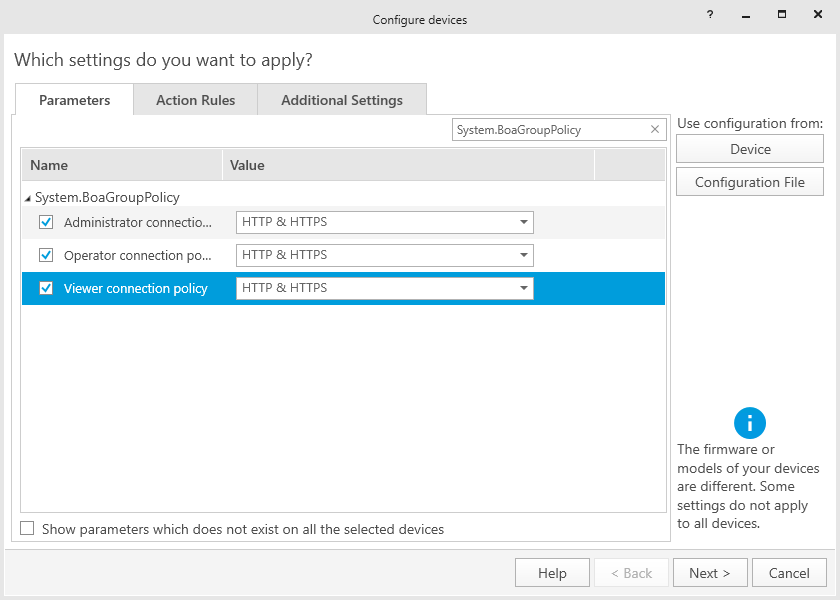
With certificates deployed to the camera, you can now enable HTTPS in Milestone by adjusting your hardware settings in Milestone Management Client. Without The Boring Toolbox, you’ll need to do this for each camera one by one. We’ve included both sets of instructions below for how to accomplish this task with and without The Boring Toolbox.
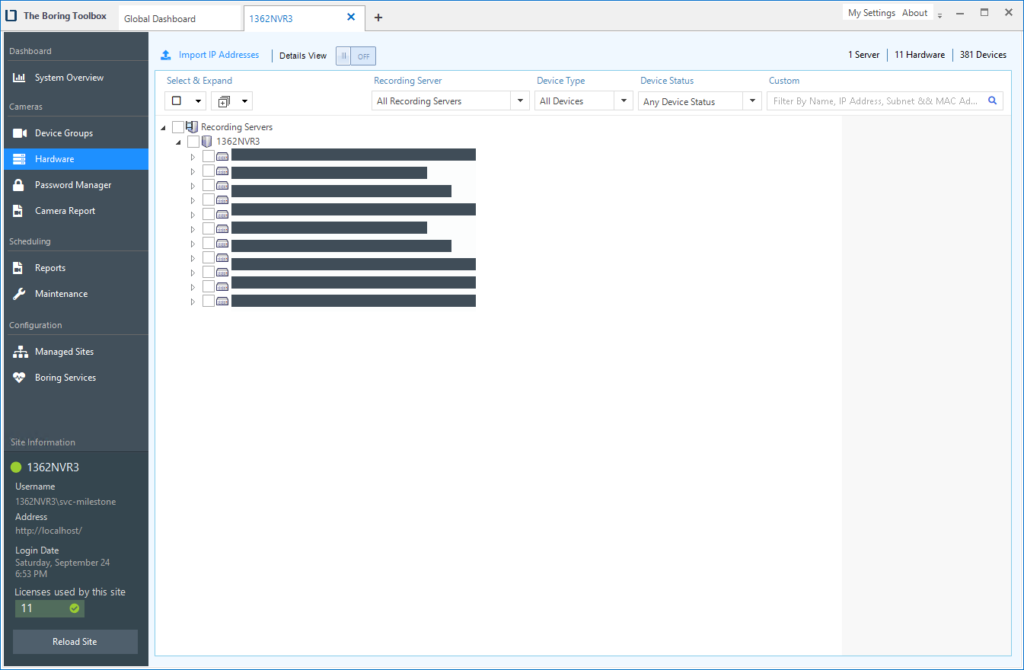


This forces Milestone to re-authenticate the hardware using HTTPS and ensures you will Milestone will still be able to pull video. To assist with this, The Boring Toolbox will keep the cameras you just enabled with HTTPS in Milestone checked so that you can quickly click disable hardware in the right context menu and then afterward enable hardware. This allows you to update HTTPS settings on hundreds of cameras in three to five clicks instead of thousands.
Here is a quick video to show you exactly how bulk updates work in The Boring Toolbox:

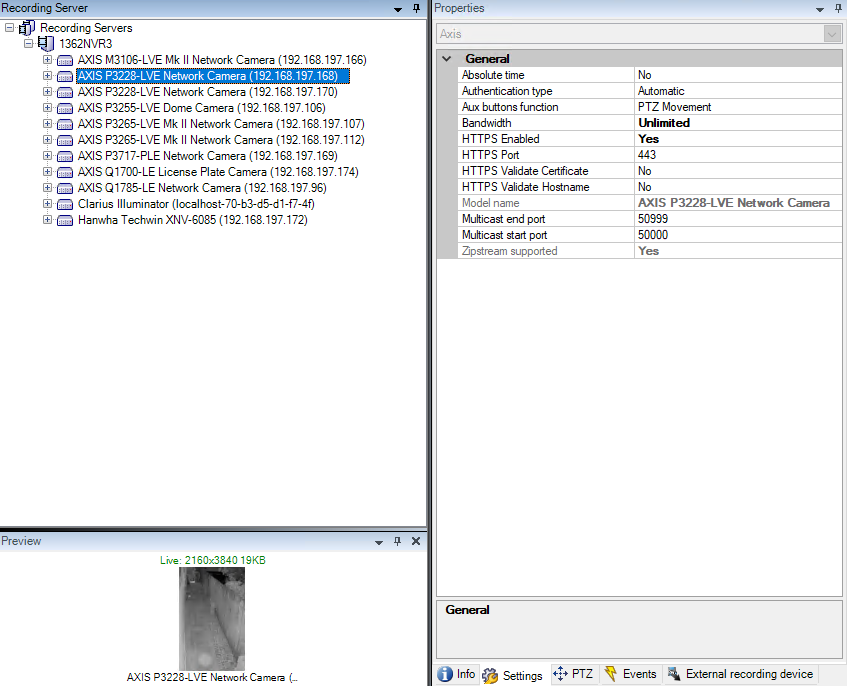
If you have more than a handful of cameras, you can see why this tedious task might take you an annoying amount of time to complete.
You can save yourself the headache by signing up for a 30-day free trial of The Boring Toolbox and utilizing the bulk update functionality to change the settings on all of your hardware at once.

Your go-to XProtect eXPerts. We learn the technical stuff that will save you time and make it less boring.

Your go-to XProtect eXPerts. We learn the technical stuff that will save you time and make it less boring.

Zipstream can dramatically reduce storage and bandwidth in Milestone, but only if it’s enabled correctly. This guide breaks down how...

We break down the essential fields every CCTV excel report needs for inventory and storage management and how to automate...

Managing over 240 cameras across a growing city isn’t easy—especially when one person is responsible for it all. See how...